My Rube Goldberg Alarm Clock
I built a Raspbery Pi based alarm clock sometime in 2022. I have been meaning to write about it for a while but it has been difficult to do. What began as a music playing alarm clock has evolved into a Rube Golberg machine of sorts and is slowly evolving into a home IOT management system. I will attempt to document the current state of the alarm clock and how it began in this article, with a sprinkling of technical details.
To get started, here is what waking up to it is like in December 2023:
Background and Inspiration
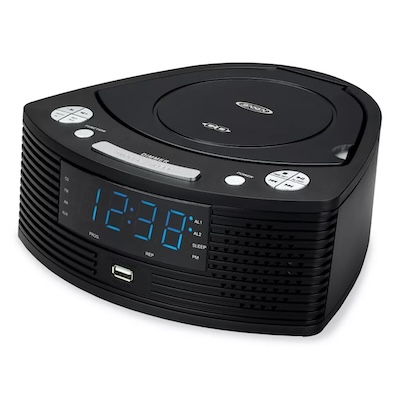
When I was in High School I had a CD Player Alarm Clock. Basically, when the alarm went off it would start playing whatever CD was inside it. I think it also supported radio and maybe even iPods to some extent. It looked something like this:
When I moved back to Worcester in 2018, I was thinking about that alarm clock after years of using my smart phone as an alarm clock, waking up every day to a variety of terrible ring tones. I also thought there would be benefit in removing my smart phone entirely from the sleep equation.
Looking around online CD Player Alarm Clocks are still alive and well. The thing is, I mostly stopped collecting CDs a decade ago. I still have a pretty big CD collection from back in the day, but it is in storage and I don't have the space or desire to make the CDs easily accesible. But I guess I could do what I did in high school and just wake up to "The Shower Scene" by Brand New every single day.
There was one other problem. I had been running my water heater (which I use to make coffee in the morning) on a digital timer outlet(this exact model).

In fact I had been kinda using the sound of the boiling water as an alarm clock because I had the water heater in my bedroom. The idea was that I would wake up and hear the boiling water and think about coffee and get out of bed. This had limited success and I was still relying on my phone as a back up alarm clock. How could I combine the two? How could I make music start playing and heat up my water at the same time?
The key to the setup with the water heater and the timer outlet is that the water heater is "analog". By that I mean, if you click the switch on the water heater while it is unplugged and then you plug it in, the water starts heating. The switch automatically switches back to off when a temperature probe inside of it reaches a certain temperature. A lot of water heaters are like this, meaning you can control them with a timer outlet. Most CD players and CD player alarms are not "analog" in this way. But you know what is analog? The cassette player boombox I had in my attic.

Much like the water heater, my boom box would begin playing a cassette if the "play" button had been pushed down prior to getting power. The play button would also turn itself off when the side of the cassette it was playing reached the end.
I plugged both the boom box and the water heater into my timer outlet. I put one of the only cassettes I own, American Beauty by the Grateful Dead into the boombox. This tape is particularily good because side A starts with Box of Rain and side B starts with Ripple, both great songs to wake up to and start the day in a good mood
Basically, in the morning I would wake up to the Grateful Dead and 7 things would eventually happen:
- I would wake up.
- I would eventually get out of bed, usually when I heard the water heater click itself off.
- I would make coffee with my hot water.
- Eventually whatever side of American Beauty would end.
- The timer outlet itself would switch off (I had it set to stay on for an hour, exceeding the length of either side of American Beauty on cassette).
- I would flip the cassette to the other side and press 'play'
- I would fill the water heater with water, put it back on it's base and click it on.
I should note I didn't hang around waiting for these things. Often I would do steps 6 and 7 in the evening.
This situation was not ideal but it got the job done. Three problems stood out to me:
- Changing the alarm time was annoying. The digital interface on my timer outlet was not easy to view or use.
- The music did not fade in. It started playing at whatever volume the boom box was set to. I tuned this over time but it was always a problem. Certain volumes would wake me up and immediately annoy me, way too loud, not a good way to wake up. Other lower volumes, might wake me up but it wasn't guaranteed. So I had to use the louder setting, which sucked.
- The water heater wasn't ready when I woke up. Let's say I heard Bob's amazing singing voice on Box of Rain and immediately woke up and was ready for the day. My hot water wasn't hot yet! I had to hang around and was tempted to go back to sleep.
Furthermore, this system wasn't particularily expandable. Any device I added to it would suffer from the same issues as the water heater and boom box, unless I added additional analog controls. While this worked I wanted to go digital and sat on the idea for quite a while.
Minimum Viable Product
In 2022, I decided it was time to not only paint my bed room but also strip off the old wallpaper and failing ceiling texture. I resurfaced both the ceiling and walls to mediocre effect.
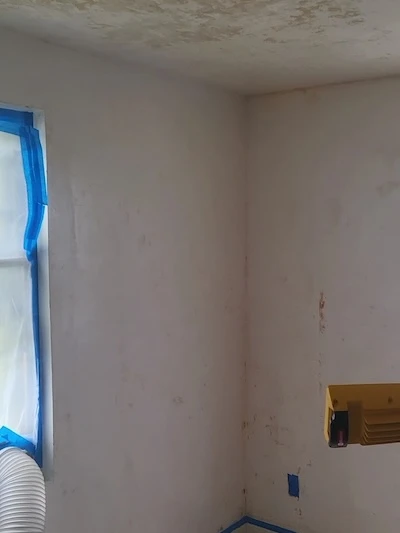
With this big change, it seemed like a good time to improve my alarm clock situation.
This project has been difficult to document because it is constantly evolving and every changing. Regarding the technical aspects, many of the initial decisions I made were meant to enable this. I wanted this alarm clock to be reliable but also hackable.
Reliability
While this project could certainly be implemented with an Arduino or some other microcontroller, I knew from the start I wanted it to have netowrk access. I also knew I wanted whatever tech I used to have a reliable clock, I didnt' want to have to add a module to keep track of the date and time and worry about it at all. I also wanted it to be able to play music thru computer speakers. The Raspberry Pi, provides all three of these requirements and I already owned several of them, so I went with that.
I flashed Raspbian to an SD card and got the raspberry pi setup. Raspbian is based on Ubuntu Linux and from what I can tell, the best way to guarantee that a certain program runs at a certain time is by using cron. Sure, there is other, more sophisicated scheduling software out there. But it can crash. It isn't part of the operating system. It isn't 48 years old! Cron is truely battle tested and I decided, at a base level, my alarm clcok would be based on it.
Hackability (Hackage)
Cron as a basis serves well when it comes to hackage. Cron will run a script at a particular time, always. The structure of the script enables hackage.
I decided that cron would run wake_up.sh once a day at a particular time. In turn, wake_up.sh would invoke various subsystems via other scripts. The idea was that wake_up.sh could call start_music.sh or even start_music.py without worrying about anything else.
This meant when I was adding a component, say a PWM light fader module, I could test it via ./fade_in_light.py and then add
./fade_in_light.py &
to wake_up.sh and it would be part of the wake up sequence without its failure being consequential (ie preventing other subsystems from launching) unless it somehow crashed the entire operating system.
~~~~
The intial version of my alarm clock relied entirely on cron, like I would ssh into the Raspberry Pi, run crontab -e and change the time there. I am going to briefly document what that looked like below and then discuss the current day state of this project and the improvements I have made over the last two years. The MVP had one goal: play a random playlist of music from my media server at a set time and fade it in.
I developed two seperate scripts, one to control volume fade in and another to generate / play the playlist.
For volume fade in, fade_in_volume.sh changes the volume with amixer, turning the volume up by 5% every 2 minutes:
#!/bin/sh

increase_volume_then_wait () {
        amixer sset 'Master' $1%
        sleep 120
}

amixer scontrols
amixer sset 'Master' 0%

increase_volume_then_wait 20
increase_volume_then_wait 25
increase_volume_then_wait 30
increase_volume_then_wait 35
increase_volume_then_wait 40
increase_volume_then_wait 45
increase_volume_then_wait 50
increase_volume_then_wait 55
increase_volume_then_wait 60
increase_volume_then_wait 65
increase_volume_then_wait 70
increase_volume_then_wait 75
increase_volume_then_wait 80
increase_volume_then_wait 85
increase_volume_then_wait 90
increase_volume_then_wait 95
increase_volume_then_wait 100
Creating and then playing a random playlist was less ideal. I used mpg123 to play the music and generated a random playlist using bash hackage:
#!/bin/sh

TRACKS=10

# Find all MP3s on Camus and select TRACKS
find /home/pi/camus/Music/ -name "*.mp3"
  | shuf -n $TRACKS
  | tee /home/pi/logs/recently_played.log
  | xargs '-d\n' -L1 mpg123
If you are wondering what "camus" refers to in the script above, it is the name of my media server. I don't want to go down the rabbit hole of my media server in this article but I have an unraid server which is local network accessible and contains my vast mp3 collection among other things.
While mpg123 works quite well, this solution was not ideal because the find and shuf commands take a trivial amount of time in practice. We are really only talking about 10 seconds here, but other factors and future goals clashed with this delay.
Both of these scripts would get launched in the background via wake_up.sh which was great from an alarm clock perspective but bad from the "okay I am awake, stop playing music at 100% volume please". If I wanted to stop the music I would ssh into the Raspberry Pi and issue a kill -9 command targeting a pid I would find via ps -e. This was not ideal, but it worked, I lived with it for a bit, liked the results and began expanding. Belows I describe the current state of each alarm clock "subsystem" with some details on how it was implemented.
Web UI
After using the alarm clock for a couple months the need for some sort of UI became apparent. Logging into the Pi and manually changing the cron time was not ideal. I threw together a fairly simple UI which you can see below:
The premise with this UI was also informed by hackability and reliability as described above. I didn't want the alarm going off to depend on the web UI being online. I didn't want the web UI crashing to prevent my alarm going off. Thus the web UI is written in Python as a simple flask app. It uses the crontab library to edit the cron file.
I used HTMX for interactivity between the web UI and server. I had been curious about HTMX for a long while and this project seemed like a good opportunity to try it out. Overall, I have had a good time using it. For simple UIs, it works very well and is easy to understand, especially when coming back to it after a while.
For basic stuff, I really like HTMX, you can see me change the alarm time at ~21 seconds in the video.
In the template for the web UI, the update button looks like this:
<a class="outline" href="#" hx-post="/alarm_change_time" hx-swap="none" hx-include="[name='clock']" role="button">Update</a>
Clicking this link send a POST request to my server at /alarm_change_time, hx-include attaches the selected time as form data, for example: clock: "07:45".
On the server side, there is a flask route which handles this:
@app.route('/alarm_change_time', methods=['POST'])
def alarm_change_time():
    hour, minute = request.form.get('clock').split(':')
    cron.change_alarm_time(hour, minute)
    return ""
HTMX works by returning HTML elements as response to requests, here I return "" because there is no data that needs to be updated.
If we look at the volume indicator, which you can see in the video at around 30 seconds, the situation is a little more complicated:
<h2>Volume - <span name="volume" id="volume" hx-get="/volume_get" hx-trigger="every 1s">{{ volume }}</span></h2>
hx-trigger="every 1s" tells to ping /volume_get once a second.
On the server side, a flask route handles this request:
@app.route('/volume_get', methods=['GET'])
def volume_get():
    volume = subprocess.getoutput(bash.VOLUME_GET)
    return '<span id="volume" hx-swap-oob="true" hx-get="/volume_get" hx-trigger="every 1s"/>%s</span>'%(volume)
Notice the final line, I return an HTML element with the updated volume value which I get via bash script (aliased as bash.VOLUME_GET).
Obviously, this sort of polling would be problematic for an app with many users, but for an app only used by a single person it is acceptable.
I don't know how to feel about using HTMX swaps, I wonder if I am using them incorrectly because it feels strange to return the entire element when I am just interested in udpating the data value. It seems like having a ton of these would be difficult to maintain over time. I will definitely be re-exploring this approach in the future.
Water Heater
I really wanted to hook my water heater up to the Pi alarm, this meant I would need a 120 AC relay. I also didn't want to continue keeping my water heater in my bedroom, I wanted it in the kitchen. Eventually I built an Arduino IOT based WiFi switch, described here.
Lighting
Lighting was something I added pretty early on. I wanted to have a lamp pointed roughly at my face which would slowly get brighter as the music volume went up.
I purchased this PWM AC Voltage Dimmer and set it up with a lamp I already owned.
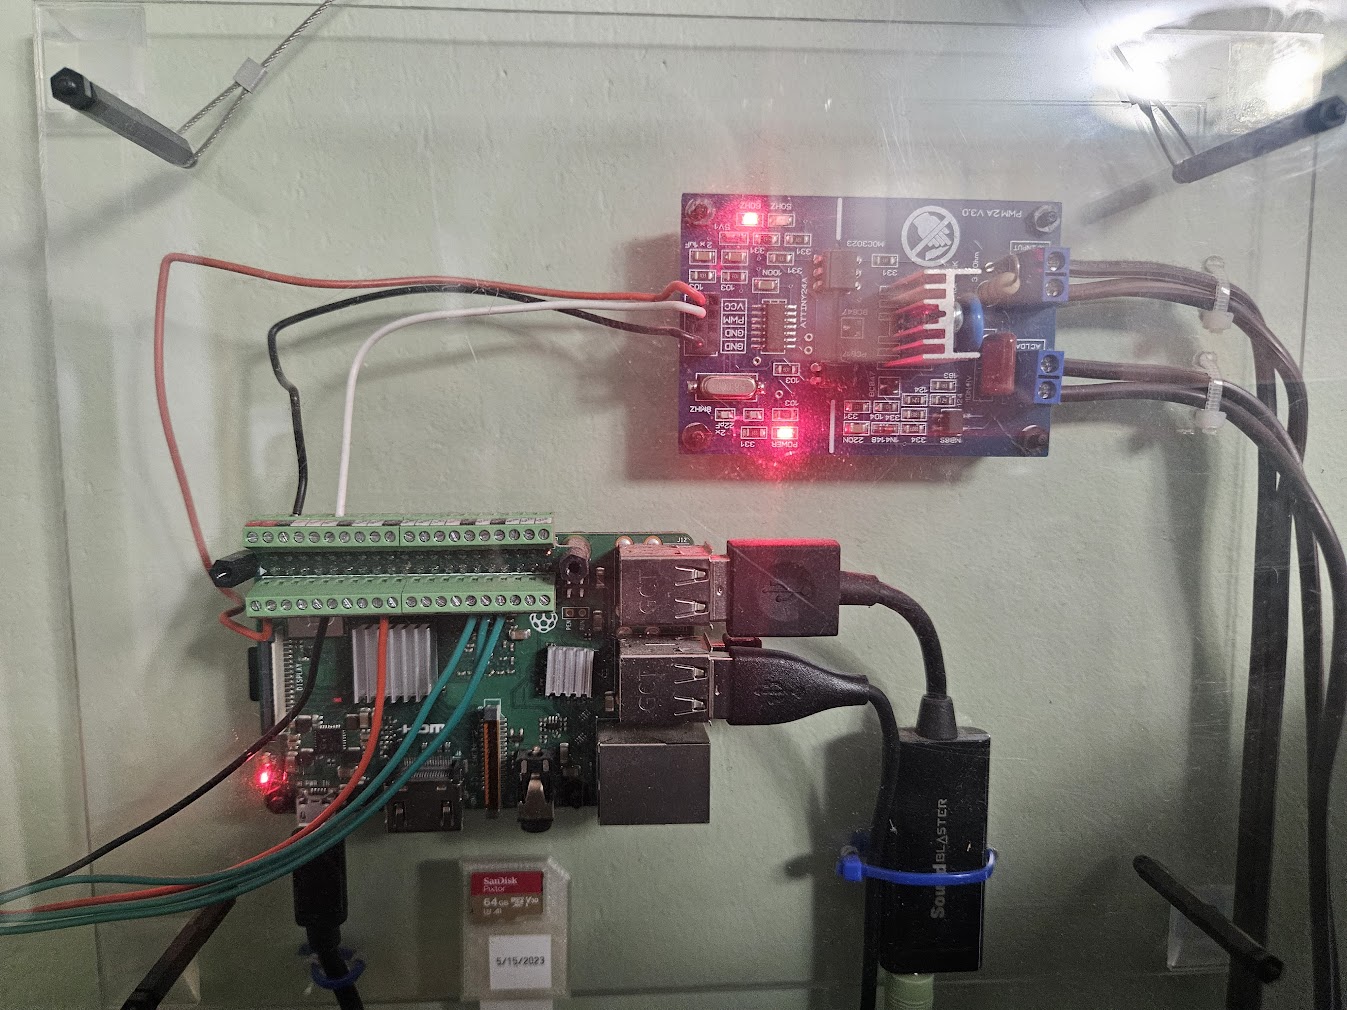
You can see the module in the top right of the enclosure. This devices does indeed have a couple spots on it that if touched would expose you to 120 AC, so make sure you are careful and enclose it properly.
Basically on the right side there are two sets of wires, one connecting to the wall and the other connecting to the lamp. The white wire running to the Pi controls the PWM signal.
To access the DIO pin on the Raspberry Pi, I used pigpiod.
# NOTE: pigpio daemon must be running in the background on the system for this to work
import pigpio
import time
import sys

PIN = 18

def fade_in(seconds_wait):
    # based on my specific light it seems like 150 is the dimmest and 800 the max
    for i in range(150, 800, 25):
        set(i)
        time.sleep(seconds_wait)

    return

def off():
    set(0)
    return

def on():
    set(800)
    return

def set(level):
    pi = pigpio.pi()
    pi.hardware_PWM(PIN, 5000, level * 1000)
    pi.stop()


if __name__ == '__main__':
    if sys.argv[1] == 'on':
        on()
    elif sys.argv[1] == 'off':
        off()
    else:
        fade_in(120)
Basically the Python pigpio interface provides methods for sending PWM signals via specific pins.
I note in the video at the start of this article, that the light flickers as it fades in. I believe this is due to the type of light bulb I used as opposed to a raspberry pi / pwm module issue.
Blinds
Since the initial setup of my alarm clock I wanted to get motorized blinds that would open when the alarm went off. I began researching motorized blinds and was shocked to learn two things:
- There are many companies selling sized-to-order motorized blinds online, almost all of them are selling the same 3 or 4 brands of blinds.
- NONE of these websites make documentation about the motors or controllers available on their website.
I emailed multiple websites to ask for the manuals that would come with the blinds. I was shocked when the three different sites I emailed all demanded that I call a "design consultant specialist" on the phone and ask them about it. I eventually ended out calling a specialist from selectblinds.com. I was able to convince this employee to send me the PDF manuals for all of the motorized blinds they offer on their website, after assuring them I would not do anything "dangerous" with the information.
These manuals weren't very helpful, there was basically no description of the motors installed in the blinds. BUT the controllers were described. The vast majority of blinds use RF remote controllers. With this knowledge I ordered a set of Premier Light Filtering Cellulars. I figured one way or another I could control these blinds via a Raspberry Pi.
When I received the blinds I initially tried to clone the signal with my Flipper Zero. While I was able to capture a signal using the "raw capture" mode on the Flipper, I could never successfully play it back. I started going down the rabbit hole of researching how RF remotes worked when a much simpler solution came to mind: hacking the controller and "clicking" the appropriate buttons with relays.

I 3D printed a panel and mounted the appropriate relays plus the controller. The nice thing is that I was able to power the controller entirely off the Pi. Both blinds can be assigned to the same "channel" on the control so they can be controlled in concert. I eventually shut off the second blind tho. The one immediately behind my bed is next to my neighbors yard and they can definitely see into my window which is not ideal in the morning.
The code for controlling the blinds relies on pigpio just like the light fader control. I quickly throw the appropriate relay signal high and set it back to low, simulating the pressing of a particular button the controller. The code looks like this:
import sys
import pigpio
import time

UP_PIN = 5
STOP_PIN = 6
DOWN_PIN = 13

if __name__ == '__main__':
    pi = pigpio.pi()

    pi.set_mode(UP_PIN, pigpio.OUTPUT)
    pi.set_mode(STOP_PIN, pigpio.OUTPUT)
    pi.set_mode(DOWN_PIN, pigpio.OUTPUT)

    arg = sys.argv[1];
    if arg == 'init':
        pi.write(UP_PIN, 0)
        pi.write(STOP_PIN, 0)
        pi.write(DOWN_PIN, 0)
    elif arg == 'up':
        pi.write(UP_PIN, 1)
        time.sleep(0.5)
        pi.write(UP_PIN, 0)
    elif arg == 'stop':
        pi.write(STOP_PIN, 1)
        time.sleep(0.5)
        pi.write(STOP_PIN, 0)
    elif arg == 'down':
        pi.write(DOWN_PIN, 1)
        time.sleep(0.5)
        pi.write(DOWN_PIN, 0)
    elif arg == 'half':
        pi.write(UP_PIN, 1)
        time.sleep(0.5)
        pi.write(UP_PIN, 0)
        # Running the blind for 16.5 seconds put it
        # roughly halfway up the window if it starts
        # from the bottom
        # TODO: you might be able to create setpoints
        # TODO: on the controller itself
        time.sleep(16.5)
        pi.write(STOP_PIN, 1)
        time.sleep(0.5)
        pi.write(STOP_PIN, 0)
Music Improvements
As mentioned above, in my discussion of the MVP, I was not happy with using mpg123 and various bash commands to generate and control playlists. I really wanted to use Music Player Daemon (MPD). MPD is a daemon that runs in the background as a sort of command line iTunes.
It took me a while to set up MPD and unfortunately I don't have any notes describing the struggle. I just remember it took a while to get things working. In addition to MPD, I installed MPC to control it. Finally, I installed ashuffle for generating random playlists.
When my alarm goes off in the morning this sequnce of commands runs:
mpc clear                            # clear any playlists currently loaded into MPD
/home/pi/scripts/fade_volume_in.sh & # start volume fade in
ashuffle --only 20                   # generate 20 song playlist and load it into MPD
mpc play                             # play that playlist
Basically, mpc clear stops anything that is currently playing, fade_volume_in.sh resets the volume and starts fading it in, ashuffle creates a 20 song playlist and then mpc play plays that playlist. This happens much faster than the MVP bash commands described at the beginning of this article.
One of the really nice things about using mpd is that I am able to hook into with other apps. If I want to listen to the music with the alarm clock during the day I control it with MPDroid.
Birthdays
If you watched the video above you might have noticed the birthday feature in the web UI, basically on the Pi is a json file containing all the important birthdays in my life.
        {
            "first_name": "Chester",
            "last_name": "McTester",
            "month": 8,
            "day": 27,
            "year": -1,
            "phone_number": "555-555-5555"
        },
Both year and phone_number are optional values. If year is present I show their age. If a phone number is in the JSON file, it creates a clickable link which will open the default text message app on an Android phone with a pre-populated birthday message.

Weather
Once again, if you watched the web UI video above, you would have noticed the weather widget.
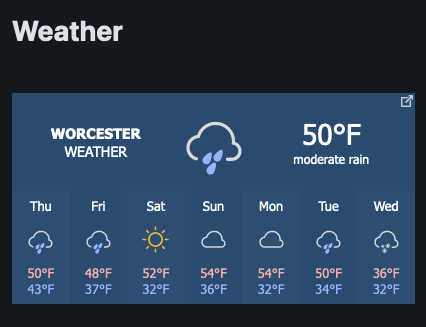
This is an embeddable widget from forecast7, it works well enough.
Future Plans
I will continue adding to this thing, probably pushing into more explicitly DIY Home Automation system. Here are some plans:
- I would like to have real time indoor and outdoor temperature displayed on the page. Possibly with an arrow indicating whether the temperature is trending up or down. I plan on redoing my TempDiff project with an Arduino IOT so it can provide temperature data.
- I'm currently building automation tools for my fish tanks, when this is complete I will integrate it's controls and data into the Web UI.
- Email alerts for above sensors. I want to get emailed if a fish tank is too cold or the indoor temperature drops below a specific point. I could send these emails via the Raspberry Pi.
- Thermometer control. I have an oil furnace and I would like to be able to change the temperature. I'm this close to building a DIY Arduino Thermostat as I don't like the available options. We'll see what happens.
- Sort of ridiculous, but usually when I send a birthday text to someone I take a picture of my dog and add a bunch 🎂🎁🥳 emojis to it. I would love to hook up to the Google Photos API and automate this process. Like I click a link, it finds a photo of my dog from google photos, uses some sort of vision processing to not cover up my dogs face and insert some random emojis. We'll see if I ever get around to that. I find Google Photos search to be baffling. There are 100s if not thousands of photos of my dog in there, but when you search "dog" only like 30 show up. Not sure why that is.